使用VirtualBox安装CentOS 7和Docker
版本信息
- VirtualBox:6.1.30 r148432 (Qt5.6.2)
- CentOS:7.9.2009 (Minimal)
创建虚拟机
我们打开VirtualBox,点击工具栏中的“新建”按钮,开始创建虚拟机。
首先,我们设置虚拟机的名称和存放位置。
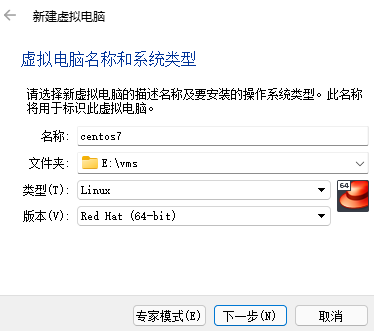
设置虚拟机的名称和存放位置
然后,我们将虚拟机的内存设置为4GB。

设置虚拟机的内存
之后,我们选择现在创建虚拟硬盘。

选择现在创建虚拟硬盘
这里,我们选择“VHD”格式的虚拟硬盘。
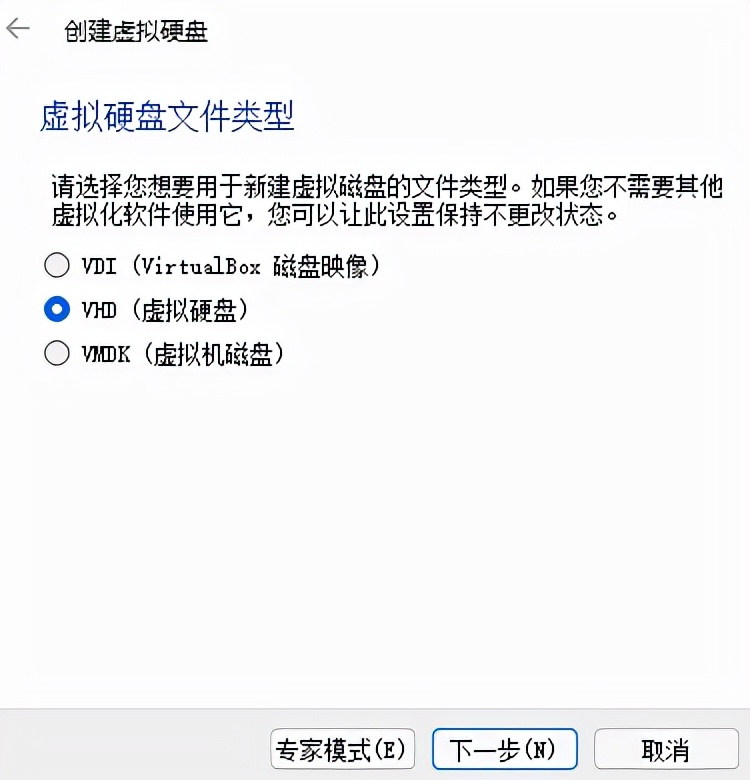
使用VHD格式的虚拟硬盘
然后,我们选择动态分配。

选择动态分配硬盘空间
之后,我们将硬盘大小设置为20GB。因为后续我们还需要安装并使用Docker,避免空间不足。

设置硬盘空间大小
点击“创建”按钮后,虚拟机即创建完成。
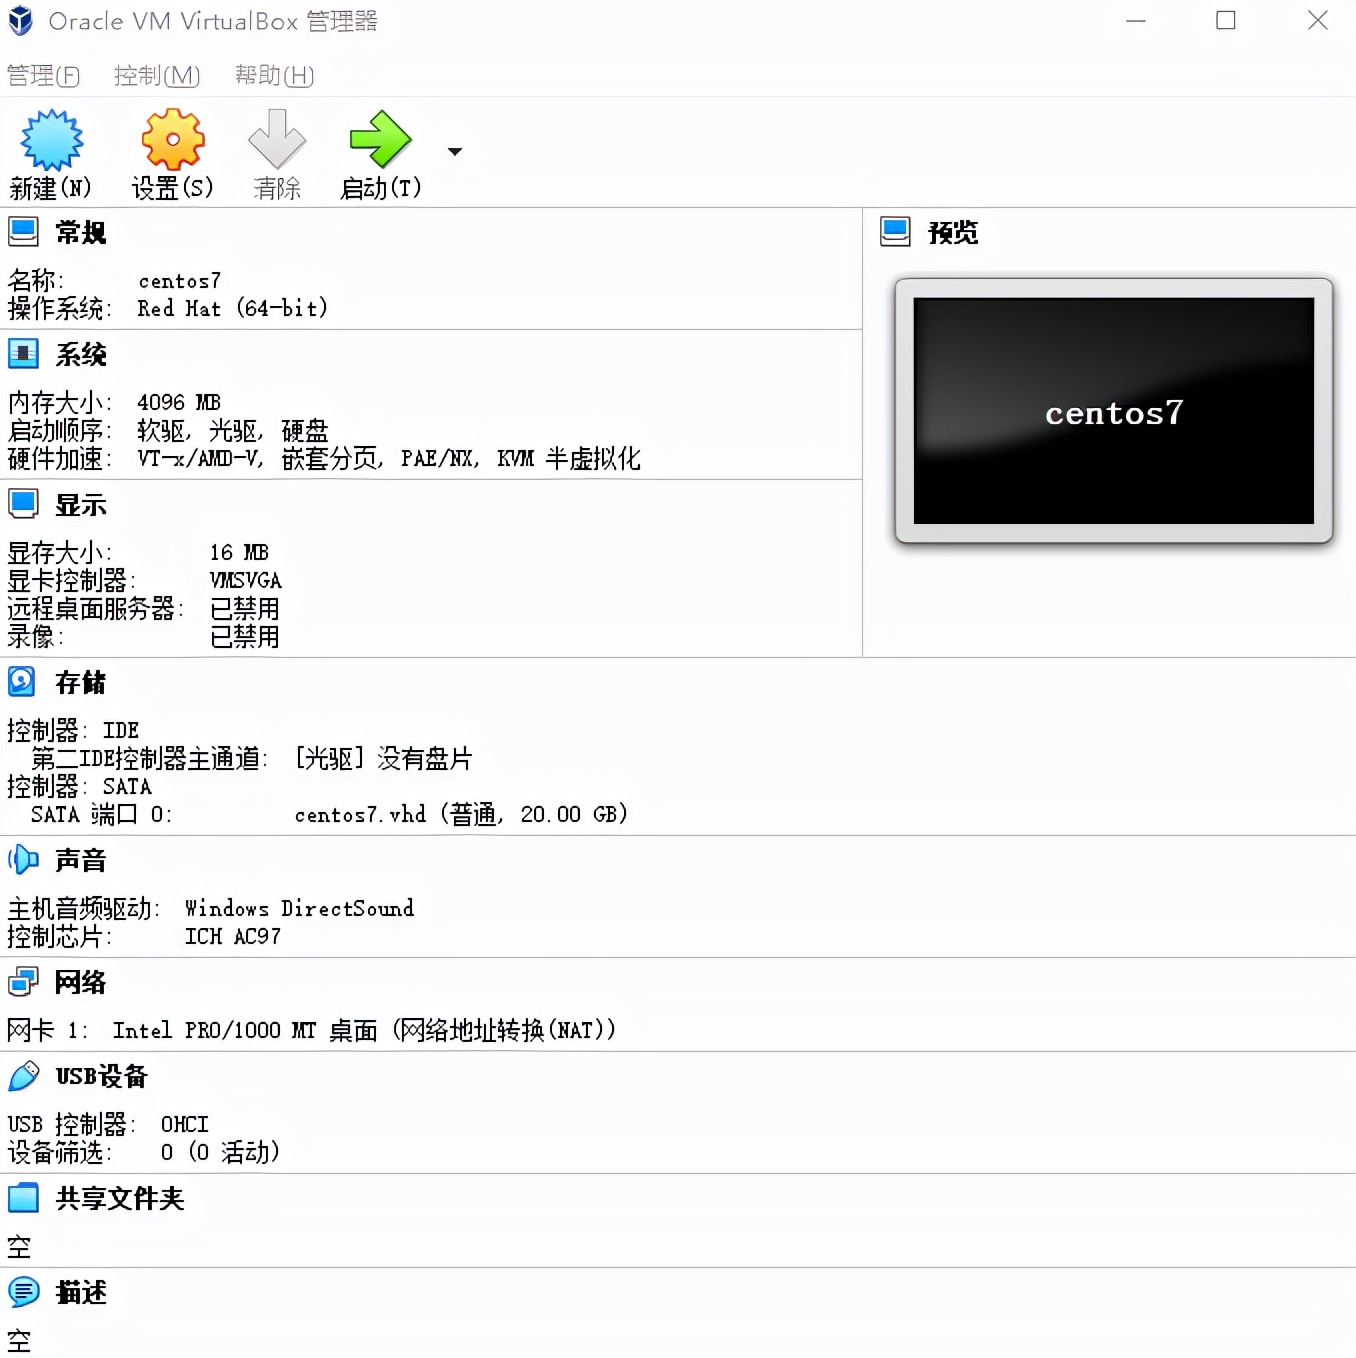
虚拟机信息
现在,我们点击工具栏的“设置”按钮,打开虚拟机的设置对话框。
首先,我们在左侧导航中选择“系统”,在右侧工作区将页签切换到“处理器”,将CPU数量设置为4个。
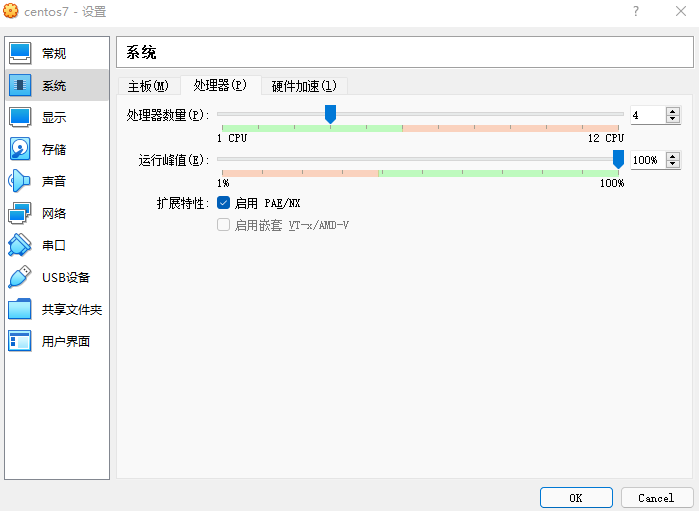
设置CPU数量
然后,我们在左侧导航中选择“网络”,将连接方式修改为“桥接网卡”,并将混杂模式修改为“全部允许”。
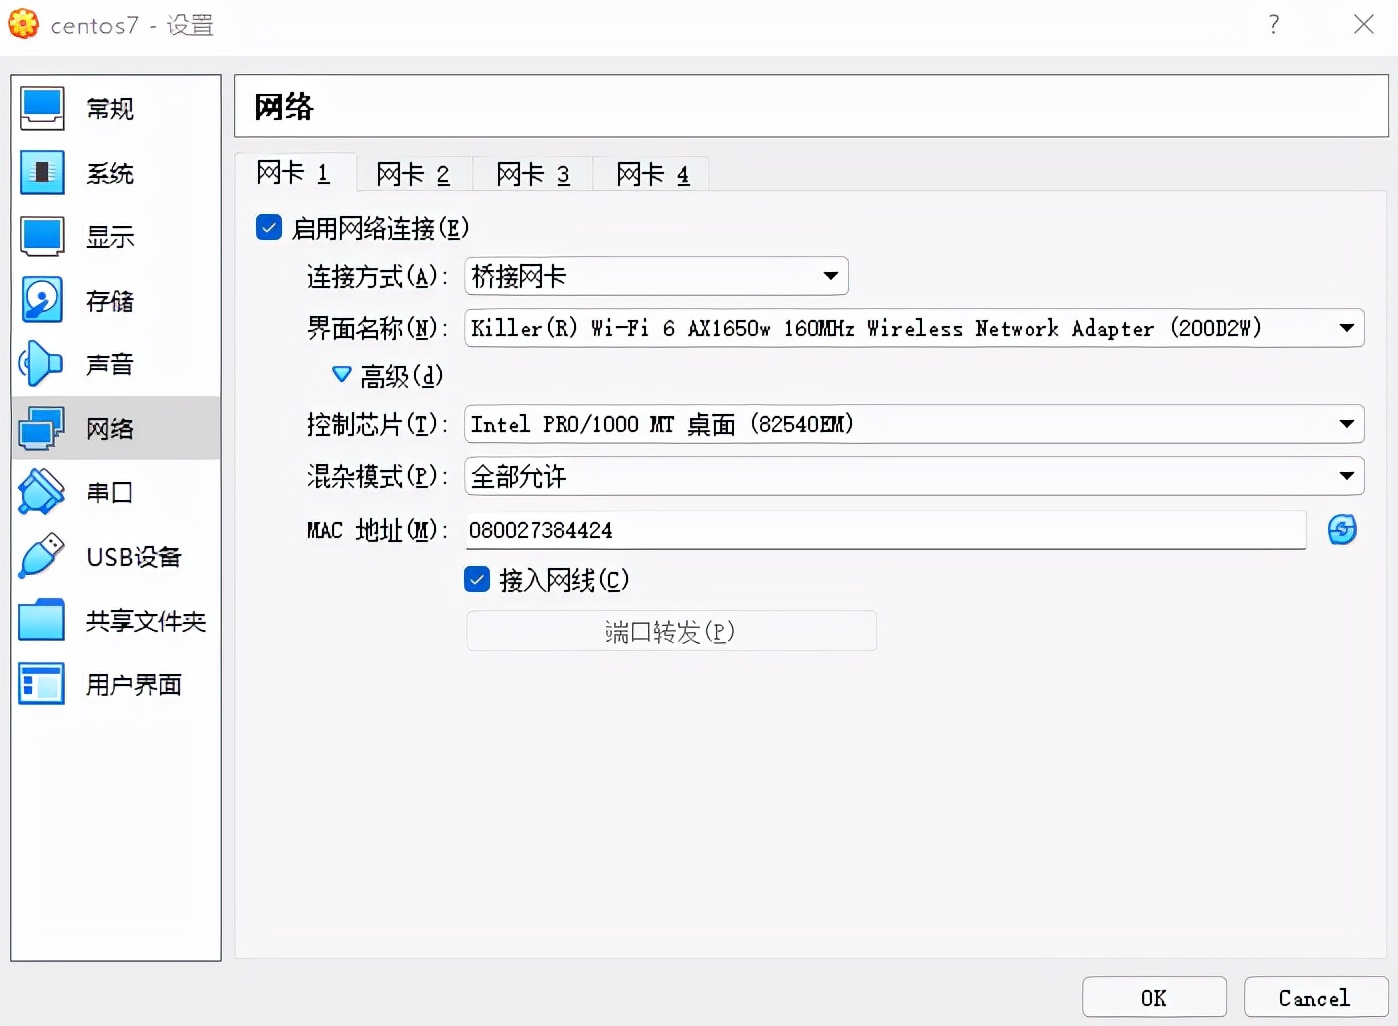
设置网卡
之后,我们在左侧导航中选择存储,在存储介质中点击“控制器:IDE”下的“没有盘片”,在右侧点击“分配光驱”后的蓝色碟片按钮,选择CentOS 7的ISO映像文件。
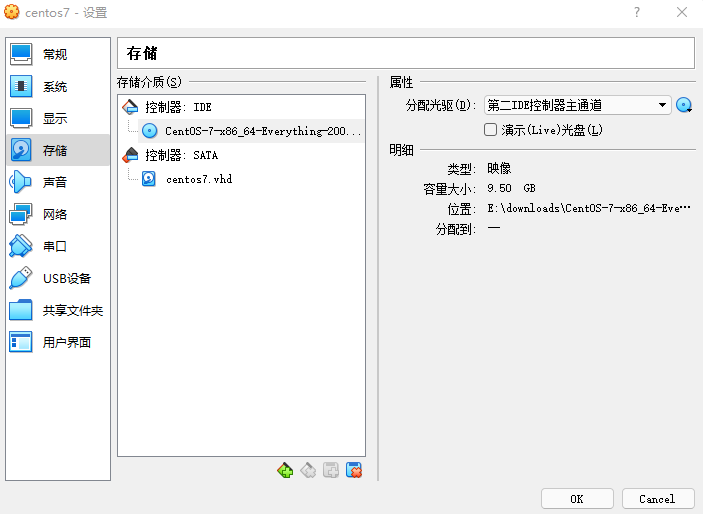
将CentOS安装盘挂载到虚拟光驱
此时,点击“OK”按钮完成配置。
现在,我们点击“启动”按钮打开虚拟机,在弹出窗口中完成虚拟机的安装过程。
安装CentOS
首先,我们通过方向键选中“Install CentOS 7”,点击回车开始安装。
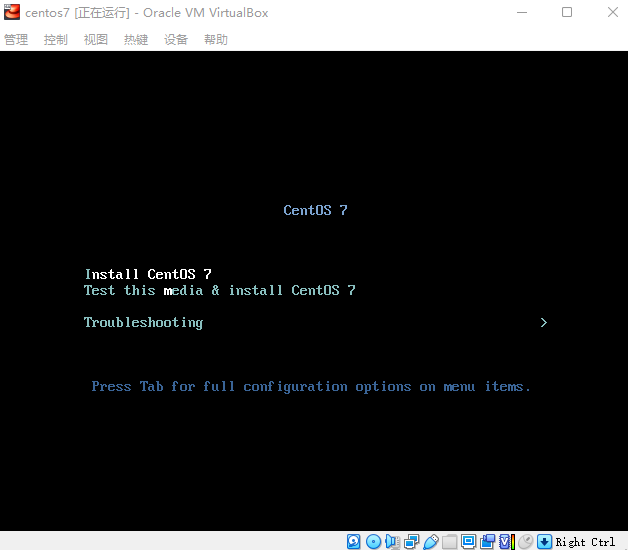
开始安装CentOS
之后,我们等待安装程序启动完成,并通过鼠标点击虚拟机窗口,使其捕获鼠标以进行后续操作。当我们需要使用鼠标操作虚拟机外的内容时,可通过单击右侧的“Ctrl”按钮来退出虚拟机对鼠标的捕获。
此时我们选择英语和美式键盘。因为后续我们主要以远程连接到虚拟机为主进行操作,使用英语和美式键盘更加方便。
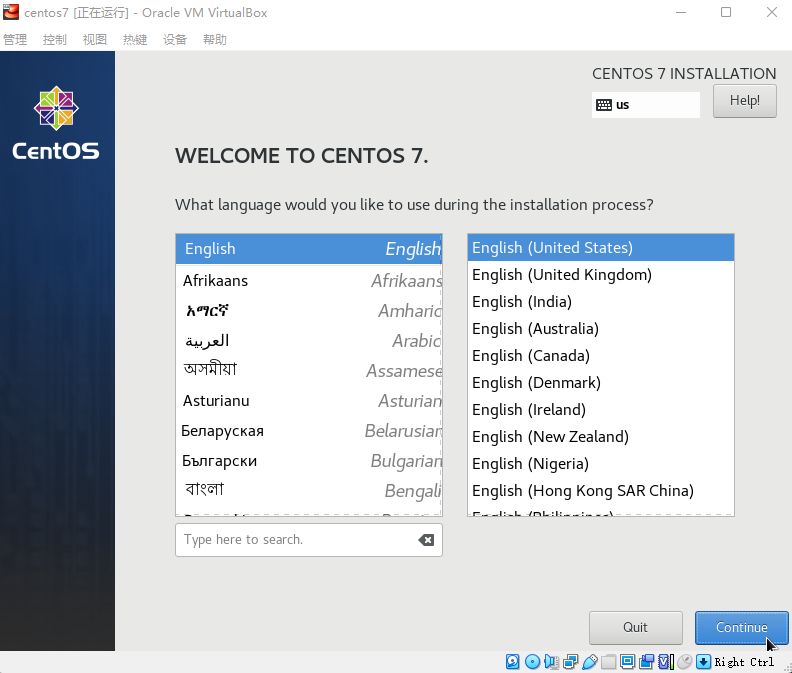
选择英文和美式键盘
然后,我们将时区设置为上海(Asia/Shanghai),并选择安装到的硬盘,便可开始安装。
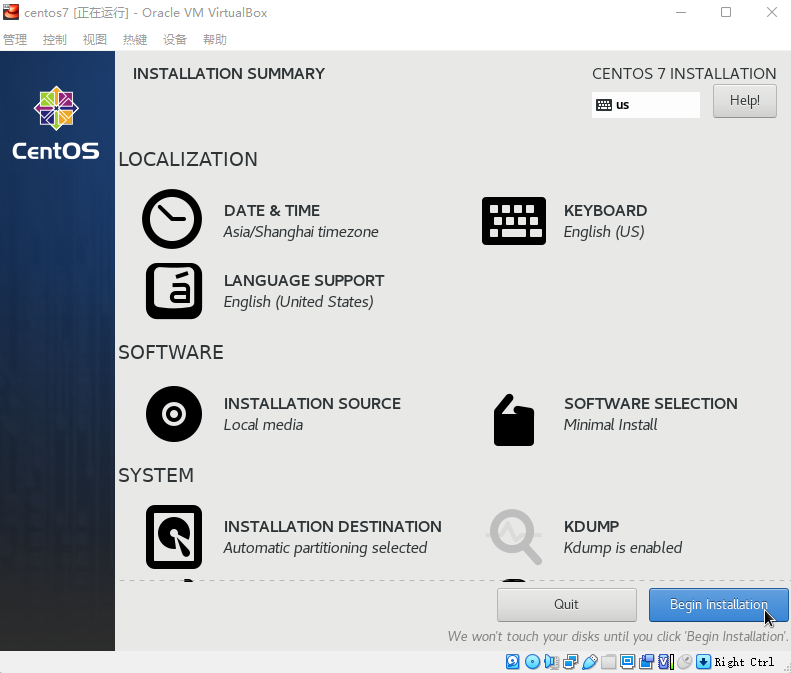
选择时区和安装位置
在安装过程中,我们需要设置“root”账户的密码,不需要创建其他账户,后续我们直接使用root账户即可。
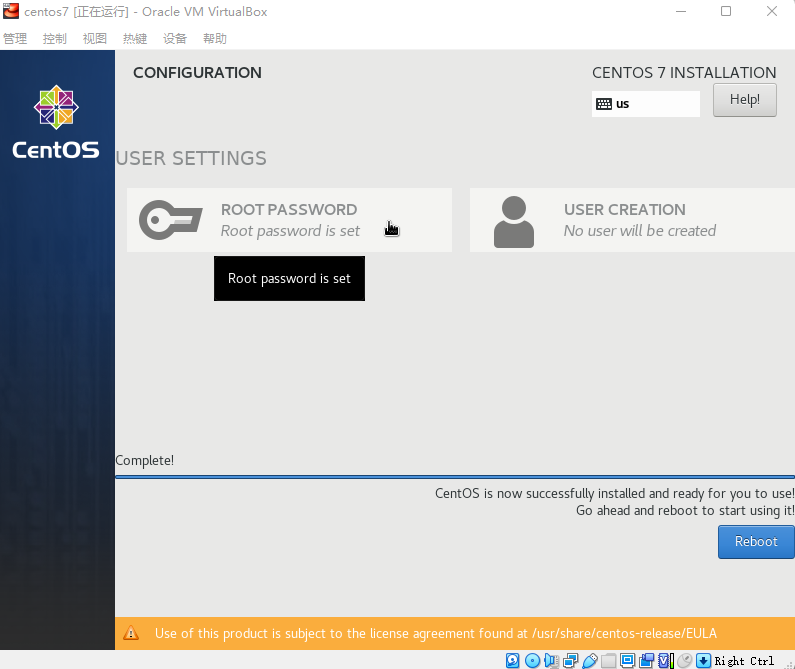
设置root密码并等待安装完成
安装CentOS需要一段时间,等到安装完成后,我们点击“Reboot”按钮重启即可。
重启时,之前挂载的虚拟机光驱会被自动移除,不需我们进行操作。
待重启完成后,我们即可开始配置虚拟机的网络。
配置网络
查看网卡信息:
nmcli device status
其输入为:
DEVICE  TYPE      STATE         CONNECTION
enp0s3  ethernet  disconnected  --
lo      loopback  unmanaged     --
可知当前网卡处于未激活状态。
执行以下命令激活网卡:
nmcli connection up enp0s3
其输出结果为:
Connection successfully activated (D-Bus active path: /org/freedestkop/NetworkManager/ActiveConnection/1)
此时网卡已成功激活,然后我们将网卡设置为自动激活,即在后续重启虚拟机后自行激活:
nmcli connection modify enp0s3 connection.autoconnect yes
然后我们可通过以下命令来查看网卡的IP:
ip addr
其输出结果为:
1: lo: <LOOKBACK,UP,LOWER_UP> mtu 65536 qdisc noqueue state UNKNOWN group default qlen 1000
    link/loopback 00:00:00:00:00:00 brd 00:00:00:00:00:00
    inet 127.0.0.1/8 scope host lo
       valid_lft forever preferred_lft forever
    inet6 ::1/128 scope host
       valid_lft forever preferred_lft forever
2: enp0s3: <BROADCAST,MULTICAST,UP,LOWER_UP> mtu 1500 qdisc pfifo_fast state UP group default qlen 1000
    link/ether 08:00:27:90:07:e3 brd ff:ff:ff:ff:ff:ff
    inet 192.168.3.22/24 brd 192.168.3.255 scope global noprefixroute enp0s3
       valid_lft forever preferred_lft forever
    inet6 fe80::6aac:3223:294b:9d35/64 scope link tentative nopref ixroute
       valid_lft forever preferred_lft forever
此时可以看到,我的虚拟机IP为“192.168.3.22”,这里根据宿主机实际网络的不同而不同,大家需要自行查看自己虚拟机的IP。
安装VirtualBox增强功能
安装增强功能后,我们使用VirtualBox的共享文件夹功能,便于后续我们在宿主机和虚拟机间传递文件。
首先,我们需要安装依赖:
yum install -y bzip2 gcc gcc-devel gcc-c++ gcc-c++-devel make kernel kernel-devel
依赖的软件包安装完成后,我们需要重启虚拟机:
reboot
等到虚拟机重启完成后,我们在虚拟机窗口的菜单栏中点击“设备”,在下拉菜单中点击“安装增强功能”菜单项。
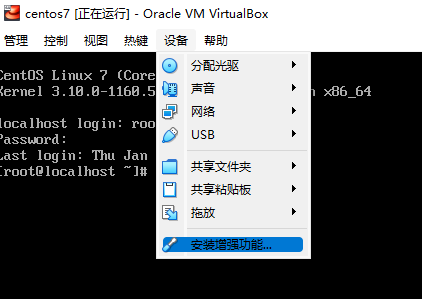
挂载增强功能虚拟光驱
此时,增强功能的安装盘会被挂载到虚拟机中,我们首先将其挂载到“/media”目录。
mount /dev/cdrom /media
其输出结果为:
mount: /dev/sr0 is write-protected, mounting read-only
然后,我们进入到CD-ROM的挂载目录,开始安装增强功能。
cd /media
./VBoxLinuxAdditions.run
其输出结果为:
Verifying archive integrity... All good.
Uncompressing VirtualBox 6.1.30 Guest Additions for Linux........
VirtualBox Guest Additions installer
Copying additional installer modules ...
Installing additional modules ...
VirtualBox Guest Additions: Starting.
VirtualBox Guest Additions: Building the VirtualBox Guest Additions kernel modules. This may take a while.
VirtualBox Guest Additions: To build modules for other installed kernels, run
VirtualBox Guest Additions:   /sbin/rcvboxadd quicksetup <version>
VirtualBox Guest Additions: or
VirtualBox Guest Additions:   /sbin/rcvboxadd quicksetup all
VirtualBox Guest Additions: Building the modules for kernel
3.10.0-1160.53.1.el7.x86_64.
此时增强功能已安装完成,重启系统后即可使用这些功能。
现在,我们可以先关闭虚拟机,在通过“无界面启动”使虚拟机在后台运行,并通过SSH工具连接到虚拟机进行操作。
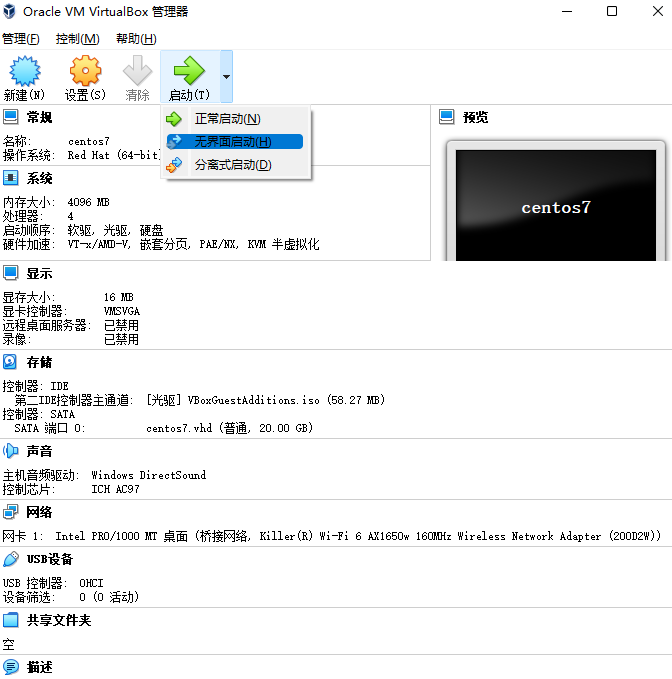
无界面启动虚拟机
安装Docker
首先,我们需要安装依赖。
yum install -y yum-utils device-mapper-persistent-data lvm2
然后,我们需要添加Docker的yum源。
yum-config-manager --add-repo http://mirrors.aliyun.com/docker-ce/linux/centos/docker-ce.repo
其输出结果为:
Loaded plugins: fastestmirror
adding repo from: http://mirrors.aliyun.com/docker-ce/linux/centos/docker-ce.repo
grabbing file http://mirrors.aliyun.com/docker-ce/linux/centos/docker-ce.repo to /etc/yum.repos.d/docker-ce.repo
repo saved to /etc/yum.repos.d/docker-ce.repo
之后,我们为新添加的yum源生成缓存。
yum makecache fast
其输出结果为:
Loaded plugins: fastestmirror
Loading mirror speeds from cached hostfile
 * base: ftp.sjtu.edu.cn
 * extras: ftp.sjtu.edu.cn
 * updates: ftp.sjtu.edu.cn
base                                                    | 3.6 kB  00:00:00
docker-ce-stable                                        | 3.5 kB  00:00:00
extras                                                  | 2.9 kB  00:00:00
updates                                                 | 2.9 kB  00:00:00
(1/2): docker-ce-stable/7/x86_64/primary_db             |  70 kB  00:00:00
(2/2): docker-ce-stable/7/x86_64/updateinfo             |   55 B  00:00:00
Metadata Cache Created
现在,我们来安装docker-ce:
yum install docker-ce
安装完成后,我们首先启动contanierd服务:
systemctl start containerd
此时我们查看containerd服务的状态:
systemctl status containerd
输出结果为:
● containerd.service - containerd container runtime
   Loaded: loaded (/usr/lib/systemd/system/containerd.service; disabled; vendor preset: disabled)
   Active: active (running) since Thu 2022-01-27 21:47:55 CST; 2s ago
     Docs: https://containerd.io
  Process: 1906 ExecStartPre=/sbin/modprobe overlay (code=exited, status=0/SUCCESS)
 Main PID: 1910 (containerd)
    Tasks: 9
   Memory: 19.2M
   CGroup: /system.slice/containerd.service
           └─1910 /usr/bin/containerd

Jan 27 21:47:55 localhost.localdomain containerd[1910]: time="2022-01-27T21:47:55.036389288+08:00" level=info msg="loading plugin \"io.containerd.grpc.v1.namespaces\"..." type=io.containerd.grpc.v1
Jan 27 21:47:55 localhost.localdomain containerd[1910]: time="2022-01-27T21:47:55.036414692+08:00" level=info msg="loading plugin \"io.containerd.internal.v1.opt\"..." type=io.containerd.internal.v1
Jan 27 21:47:55 localhost.localdomain containerd[1910]: time="2022-01-27T21:47:55.036517990+08:00" level=info msg="loading plugin \"io.containerd.grpc.v1.snapshots\"..." type=io.containerd.grpc.v1
Jan 27 21:47:55 localhost.localdomain containerd[1910]: time="2022-01-27T21:47:55.036531795+08:00" level=info msg="loading plugin \"io.containerd.grpc.v1.tasks\"..." type=io.containerd.grpc.v1
Jan 27 21:47:55 localhost.localdomain systemd[1]: Started containerd container runtime.
Jan 27 21:47:55 localhost.localdomain containerd[1910]: time="2022-01-27T21:47:55.036539893+08:00" level=info msg="loading plugin \"io.containerd.grpc.v1.version\"..." type=io.containerd.grpc.v1
Jan 27 21:47:55 localhost.localdomain containerd[1910]: time="2022-01-27T21:47:55.036546434+08:00" level=info msg="loading plugin \"io.containerd.grpc.v1.introspection\"..." type=io.containerd.grpc.v1
Jan 27 21:47:55 localhost.localdomain containerd[1910]: time="2022-01-27T21:47:55.037176018+08:00" level=info msg=serving... address=/run/containerd/containerd.sock.ttrpc
Jan 27 21:47:55 localhost.localdomain containerd[1910]: time="2022-01-27T21:47:55.037211393+08:00" level=info msg=serving... address=/run/containerd/containerd.sock
Jan 27 21:47:55 localhost.localdomain containerd[1910]: time="2022-01-27T21:47:55.037608518+08:00" level=info msg="containerd successfully booted in 0.028803s"
说明containerd服务已经启动成功,现在我们将其设置为自启动,以便于后续虚拟机重启后服务可以自动启动。
systemctl enable containerd
其输出结果为:
Created symlink from /etc/systemd/system/multi-user.target.wants/containerd.service to /usr/lib/systemd/system/containerd.service.
现在,我们来启动docker服务:
systemctl start docker
查看docker服务状态:
systemctl status docker
其输出结果为:
● docker.service - Docker Application Container Engine
   Loaded: loaded (/usr/lib/systemd/system/docker.service; disabled; vendor preset: disabled)
   Active: active (running) since Thu 2022-01-27 21:50:39 CST; 5s ago
     Docs: https://docs.docker.com
 Main PID: 1948 (dockerd)
    Tasks: 9
   Memory: 32.6M
   CGroup: /system.slice/docker.service
           └─1948 /usr/bin/dockerd -H fd:// --containerd=/run/containerd/containerd.sock

Jan 27 21:50:38 localhost.localdomain dockerd[1948]: time="2022-01-27T21:50:38.668286175+08:00" level=info msg="ccResolverWrapper: sending update to cc: {[{unix:///run/containerd/containerd.soc..." module=grpc
Jan 27 21:50:38 localhost.localdomain dockerd[1948]: time="2022-01-27T21:50:38.668292262+08:00" level=info msg="ClientConn switching balancer to \"pick_first\"" module=grpc
Jan 27 21:50:38 localhost.localdomain dockerd[1948]: time="2022-01-27T21:50:38.694832806+08:00" level=info msg="Loading containers: start."
Jan 27 21:50:39 localhost.localdomain dockerd[1948]: time="2022-01-27T21:50:39.005972171+08:00" level=info msg="Default bridge (docker0) is assigned with an IP address 172.17.0.0/16. Daemon opt...d IP address"
Jan 27 21:50:39 localhost.localdomain dockerd[1948]: time="2022-01-27T21:50:39.070999996+08:00" level=info msg="Firewalld: interface docker0 already part of docker zone, returning"
Jan 27 21:50:39 localhost.localdomain dockerd[1948]: time="2022-01-27T21:50:39.126898795+08:00" level=info msg="Loading containers: done."
Jan 27 21:50:39 localhost.localdomain dockerd[1948]: time="2022-01-27T21:50:39.146069434+08:00" level=info msg="Docker daemon" commit=459d0df graphdriver(s)=overlay2 version=20.10.12
Jan 27 21:50:39 localhost.localdomain dockerd[1948]: time="2022-01-27T21:50:39.146175958+08:00" level=info msg="Daemon has completed initialization"
Jan 27 21:50:39 localhost.localdomain systemd[1]: Started Docker Application Container Engine.
Jan 27 21:50:39 localhost.localdomain dockerd[1948]: time="2022-01-27T21:50:39.159774354+08:00" level=info msg="API listen on /var/run/docker.sock"
Hint: Some lines were ellipsized, use -l to show in full.
此时docker服务也已经启动成功。
同样地,我们将docker服务也设置为自启动:
systemctl enable docker
其输出结果为:
Created symlink from /etc/systemd/system/multi-user.target.wants/docker.service to /usr/lib/systemd/system/docker.service.
我们可通过以下命令来查看docker的版本信息:
docker version
其输出结果为:
Client: Docker Engine - Community
 Version:           20.10.12
 API version:       1.41
 Go version:        go1.16.12
 Git commit:        e91ed57
 Built:             Mon Dec 13 11:45:41 2021
 OS/Arch:           linux/amd64
 Context:           default
 Experimental:      true

Server: Docker Engine - Community
 Engine:
  Version:          20.10.12
  API version:      1.41 (minimum version 1.12)
  Go version:       go1.16.12
  Git commit:       459d0df
  Built:            Mon Dec 13 11:44:05 2021
  OS/Arch:          linux/amd64
  Experimental:     false
 containerd:
  Version:          1.4.12
  GitCommit:        7b11cfaabd73bb80907dd23182b9347b4245eb5d
 runc:
  Version:          1.0.2
  GitCommit:        v1.0.2-0-g52b36a2
 docker-init:
  Version:          0.19.0
  GitCommit:        de40ad0
说明docker服务已成功安装并运行正常。到此,我们已经成功地使用VirtualBox虚拟机安装了CentOS 7和Docker。
后面,我们会在通过Docker来部署一个MySQL数据库服务,以体验Docker服务的使用过程。

 微信收款码
微信收款码 支付宝收款码